My girls love hair bows! I have made many simple bows, but it wasn't until this year when I kept seeing these adorable bunny's that I decided to expand my bow making skills and attempt them. My girls have already started wearing these, but I am most excited about them wearing them with their Easter dresses on Easter day.
They really aren't that difficult, as you will learn with my tutorial. I think they are probably more difficult to explain how to make, than actually make. So hang in there and bare with me as I try to explain. There are lots of pictures, so if words don't work at least you will be able to see what I am trying to say.
1. First you will want to start by gathering all your supplies. Here is what you will need.

- a glue gun
- scissors
- a ruler
- 3/8inch width pink ribbon
- 3/8inch width white ribbon
- 3/8inch width pink with white polka dot ribbon
- sm pink fussy balls
- sm plastic eyes
- clear nail polish (or fray-check if you have some on hand)
- a double prong alligator clip
2. Plug in your glue gun and get it heating up while you cut all your ribbon. Here are the measurements of ribbon that you will need.
- 1 7 1/4inch piece of pink ribbon
- 1 11inch piece of white ribbon
- 3 3inch pieces of polka dot ribbon
- 2 3inch pieces of white ribbon
- 1 6inch piece of polka dot ribbon
3. Now that you have everything prepared and your
glue gun is warmed up it is time to start putting the
bow together. First you will take the pink 7 1/4inch
ribbon and glue it to the alligator clip.
I do this by flipping the clip upside down in my left hand and pinching it open. I then put a thin bead of glue on the two prongs and press the pink ribbon on it.
You then flip the alligator clip over and continue to glue the pink ribbon on in small sections at a time.
I do the reverse of my first section, then the top of the part you pinch, then the in between the pinch parts, then the bottom of the pinch part, then I hold it open again and do the back of the bottom prongs and finish by doing the inside of the bottom prongs.
 4.
4. Now that you have your alligator clip covered it is time to start on the bunny. Take one of your 3inch
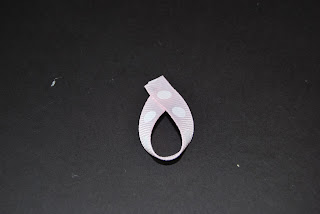
white pieces and one of your 3inch polka dot
pieces and glue them together design side out.
Once you complete this repeat with the other
white 3inch piece and one of the other 3inch
polka dot pieces.
 5.
5. Now take one of your 3inch sections,
cross the two ends and glue. Repeat with other
3inch section to make both of your ears.
 6.
6. Take one ear at a time and glue it to the end
of your covered alligator clip.
 7.
7. Time to start on the body. Take your 11inch
piece of white ribbon and cross it over its self
leaving one side longer than the other. Glue it together at the point where the ribbon crosses, making a small loop that will later become the bunny's head/face.
 8.
8. Take the shorter piece and twist it around,
gluing it to the back of the loop.
 9.
9. Now take the longer piece twist it around
and glue it to the front of the loop.
 10.
10. Now that the body of the bunny is glued together take the small loop, which is the head/face of the bunny and flip it inside out. Then flatten the loop out and glue each side of the loop to itself making what looks like an upside down triangle.
11. Take your last 3inch polka dot piece,
cross the two ends and glue them together.
 12.
12. Attach the polka dot loop to the back
of the bunny's body.
 13.
13. Put a small bead of glue across the base of
the bunny's ears and attach the body of the bunny
placing the top of its head/face on the bead of glue, making sure to cover the ugly ends of the ears with the head/face.
 14.
14. Attach your eyes and the pink puffy ball as the nose to make your face.
 15.
15. Then make a small bow out of the 6inch piece
of polka dot ribbon, trimming the ends to make
them even and getting rid of any extra length of
ribbon you didn't use making the bow. Attach the
bow right below the nose.
The finished product....


